One of our customers sent us this great write-up of their self-installed solar expansion kit.
2016 Lance 995 Truck Camper on a Ford F350 Truck.
Thank you, Kevin
Day 1
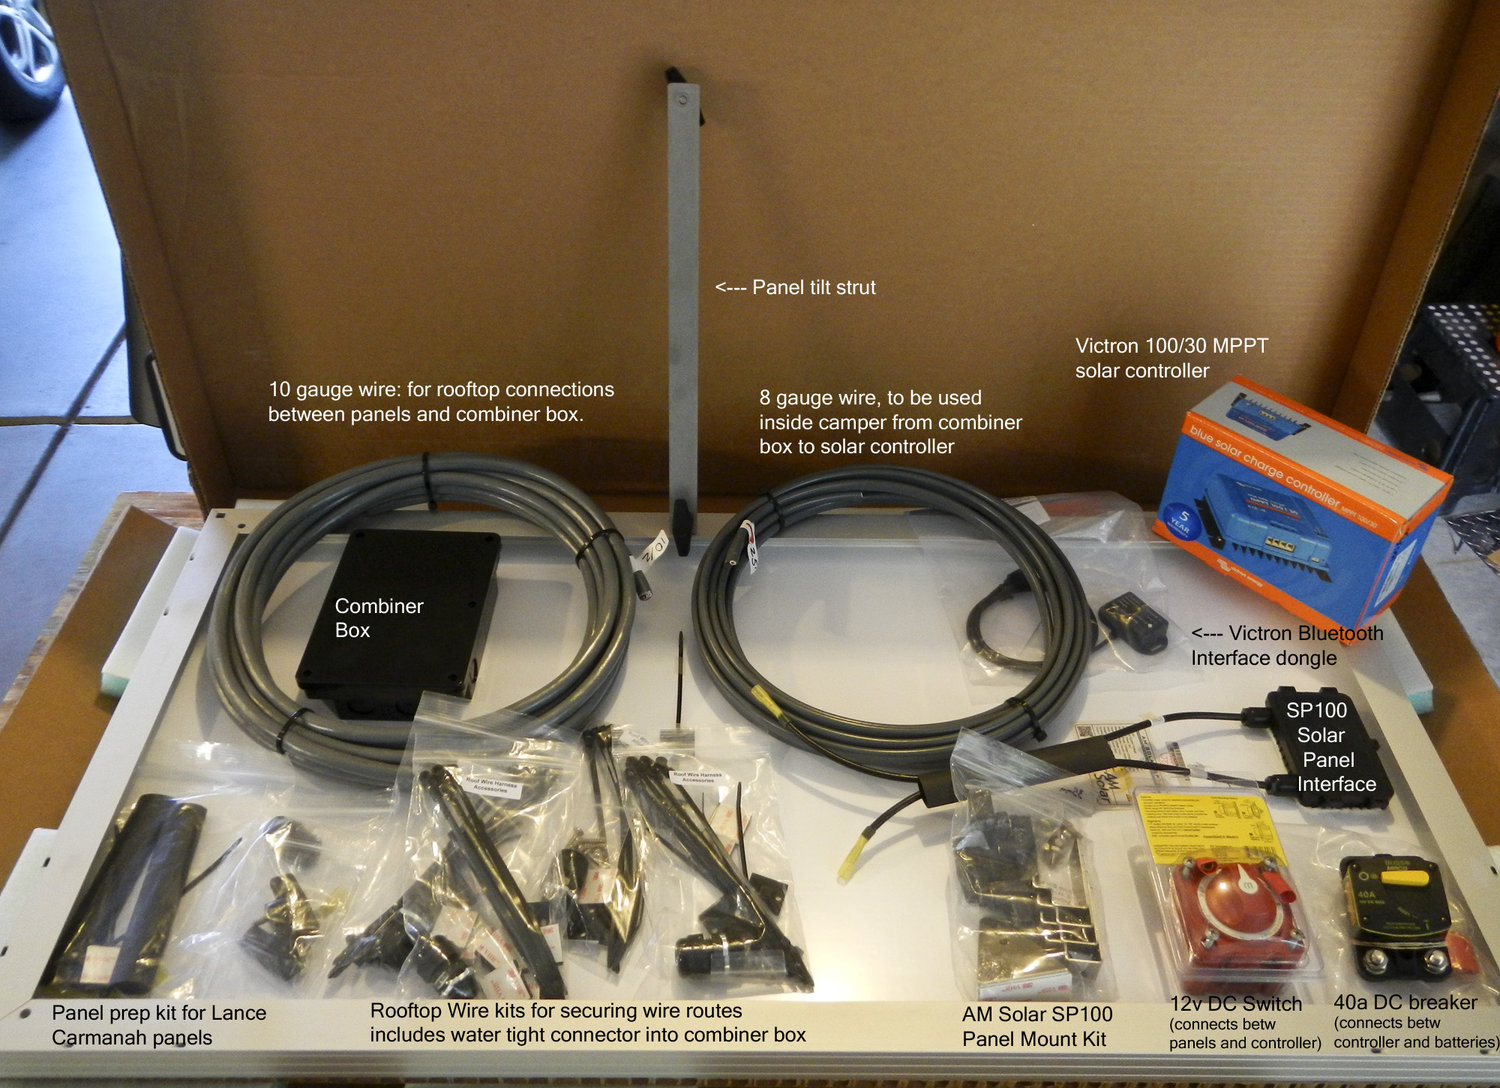
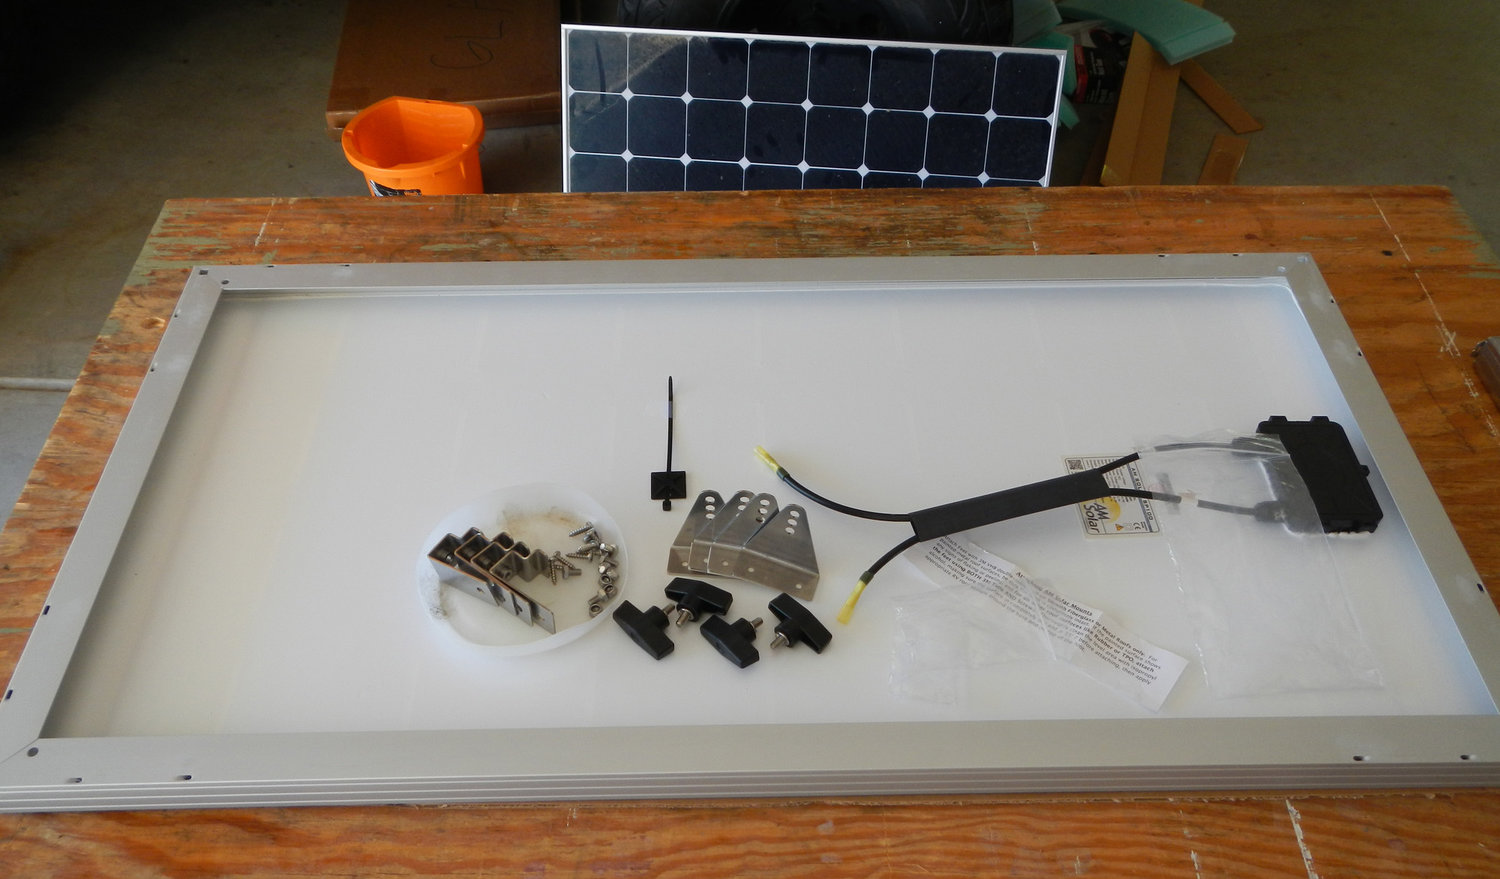
Yesterday, the solar shipment arrived. I unboxed, inspected, and inventoried the goodies. I am impressed by how well AM Solar packages and labels the kits. Here is a shot of some of the goodies and one solar panel (upside down).
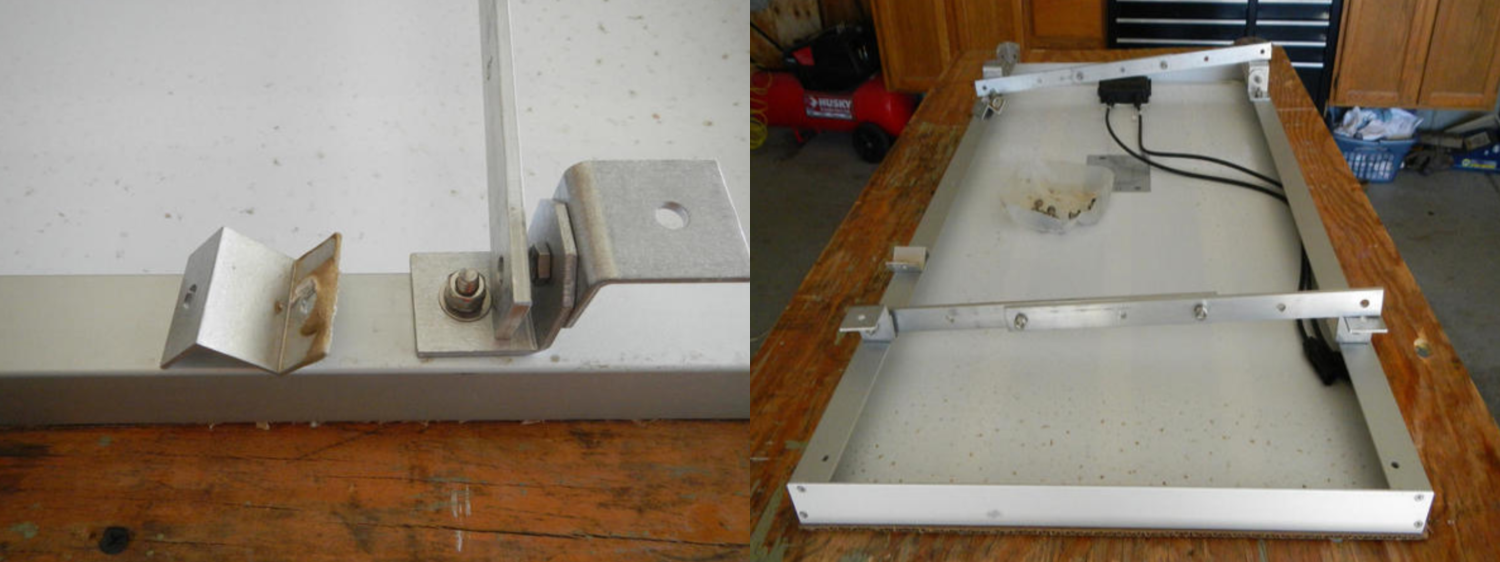
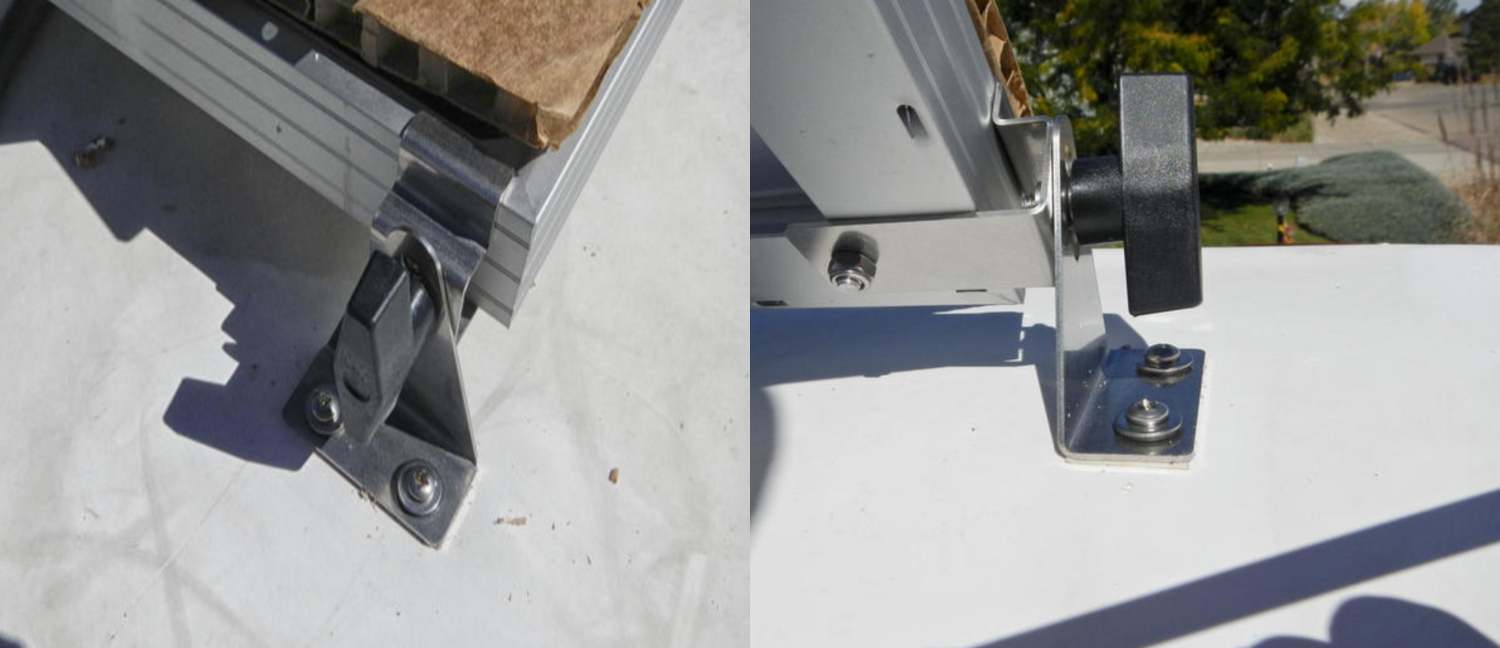
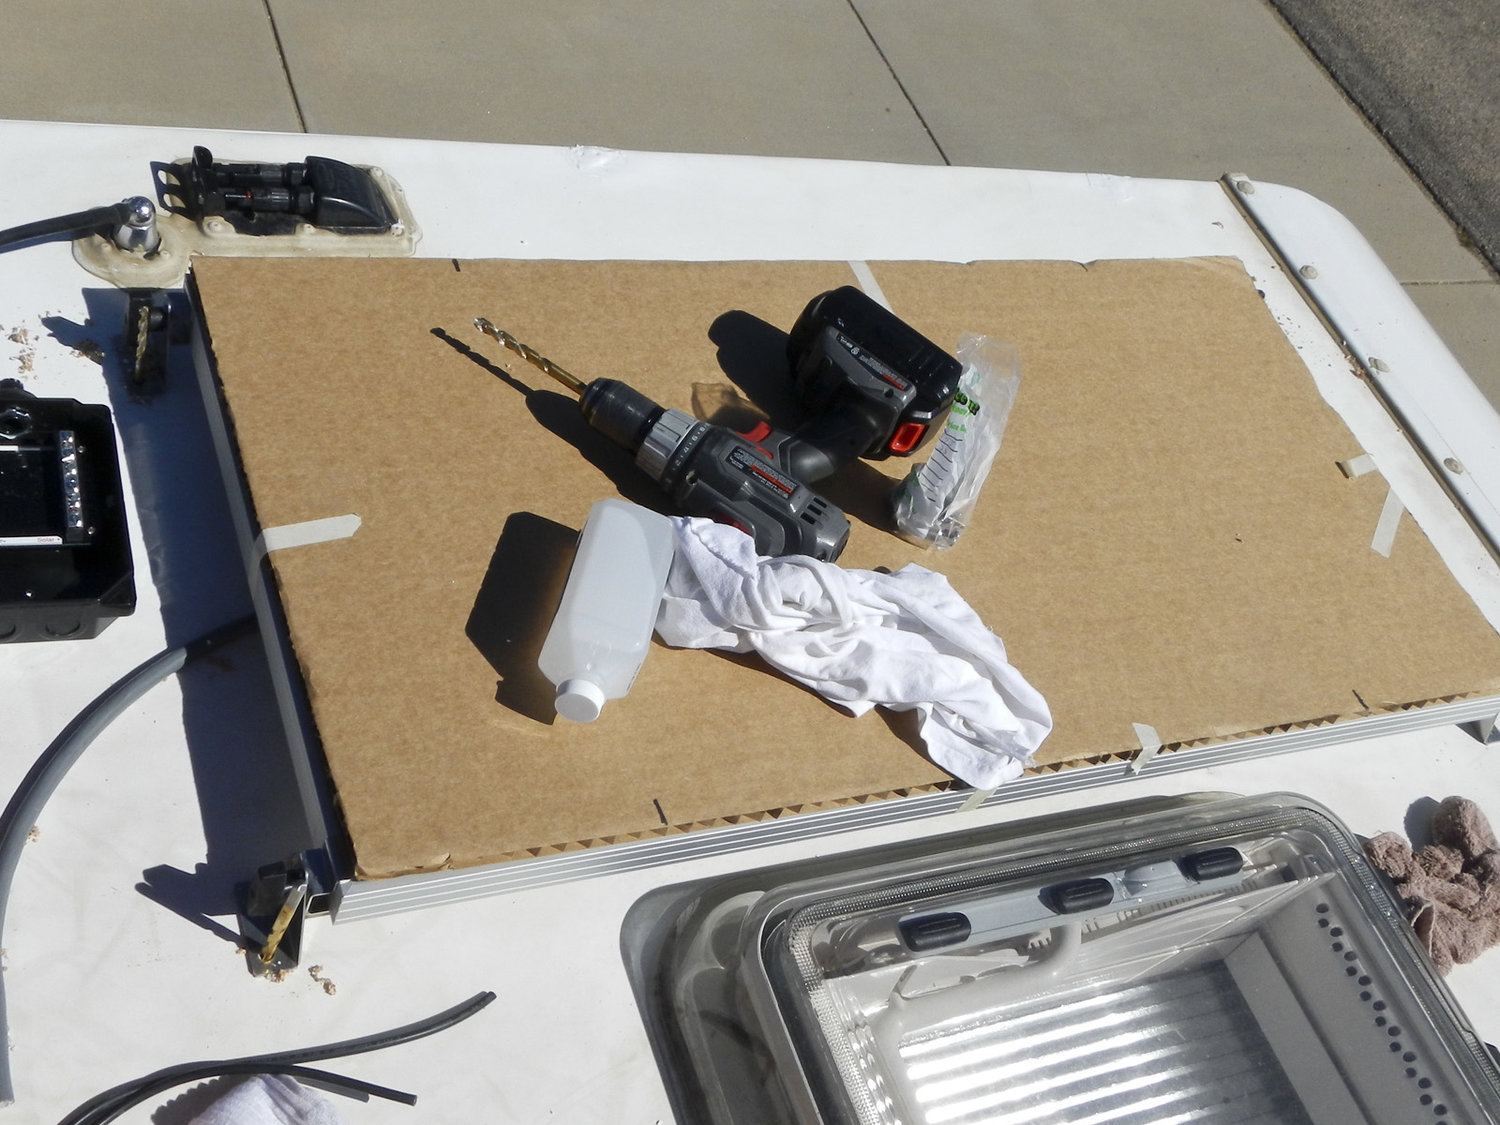
Today, I got rolling on the install. First, I went up top with cardboard cutouts to double check my placement plan. While up there, I uninstalled the Carmanah panels which came from Lance. They installed the panels with 4 Z brackets, using one 1/4″ well nut fastener in each foot, topped with Dicor. I was surprised by how easy it was to remove the fastener screw and lift the panels off the roof. Here is a shot of the old Z bracket, and the new brackets I will use (which will be tiltable).
I cut off the original MC4 connectors on the Lance panels and replaced them with 10ga duplex wires which will run to a combiner box. I did not want to daisy chain MC4 extension cables, and I really like the roof wire supplied by AM Solar. It is very flexible, which will make routing the wire a lot easier.
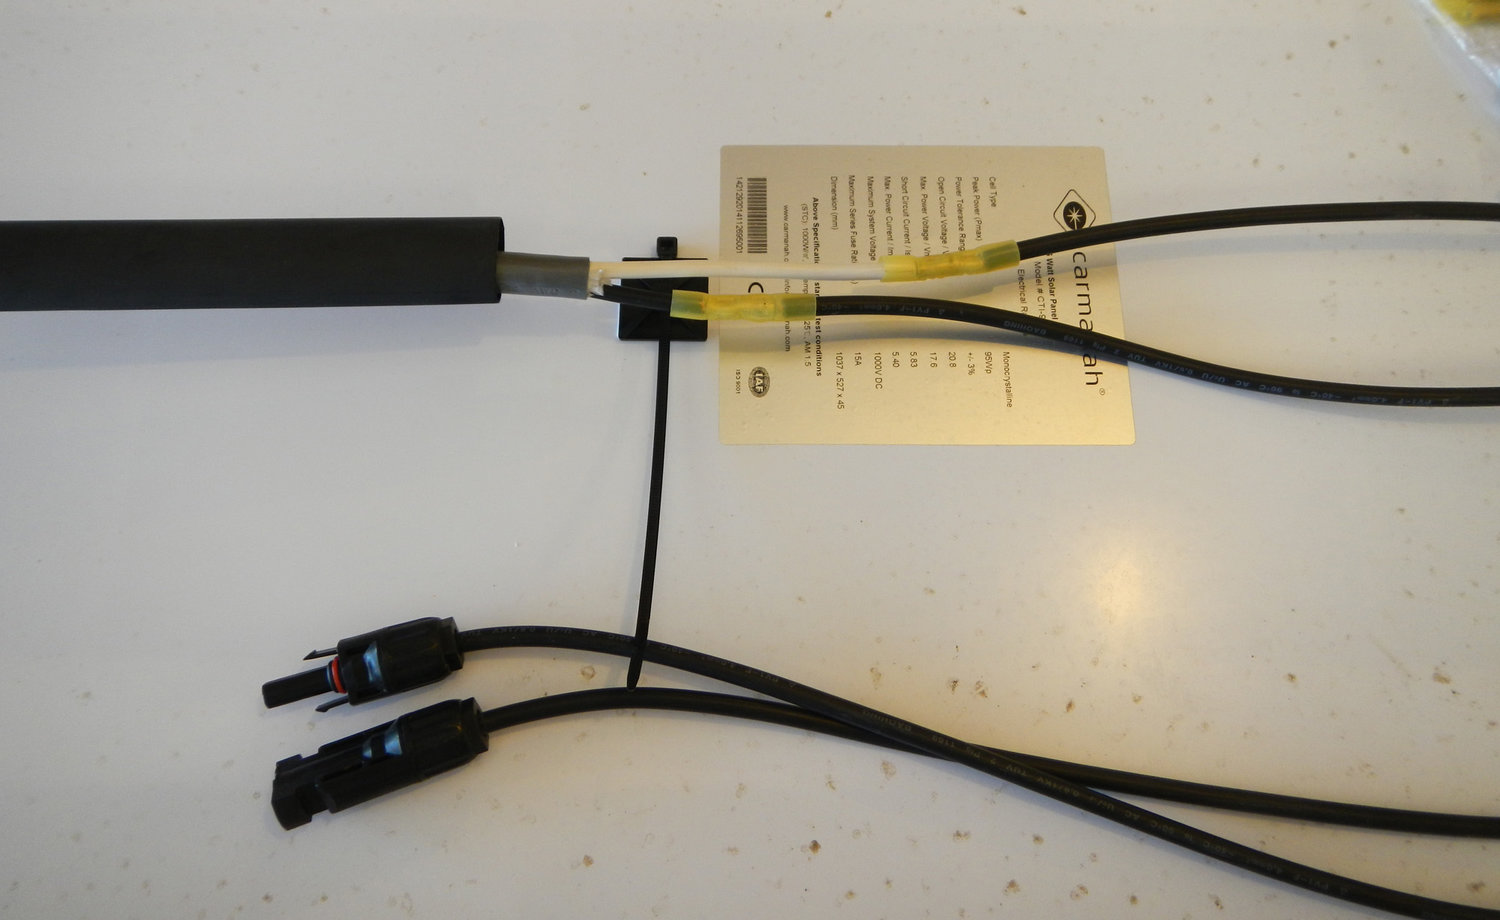
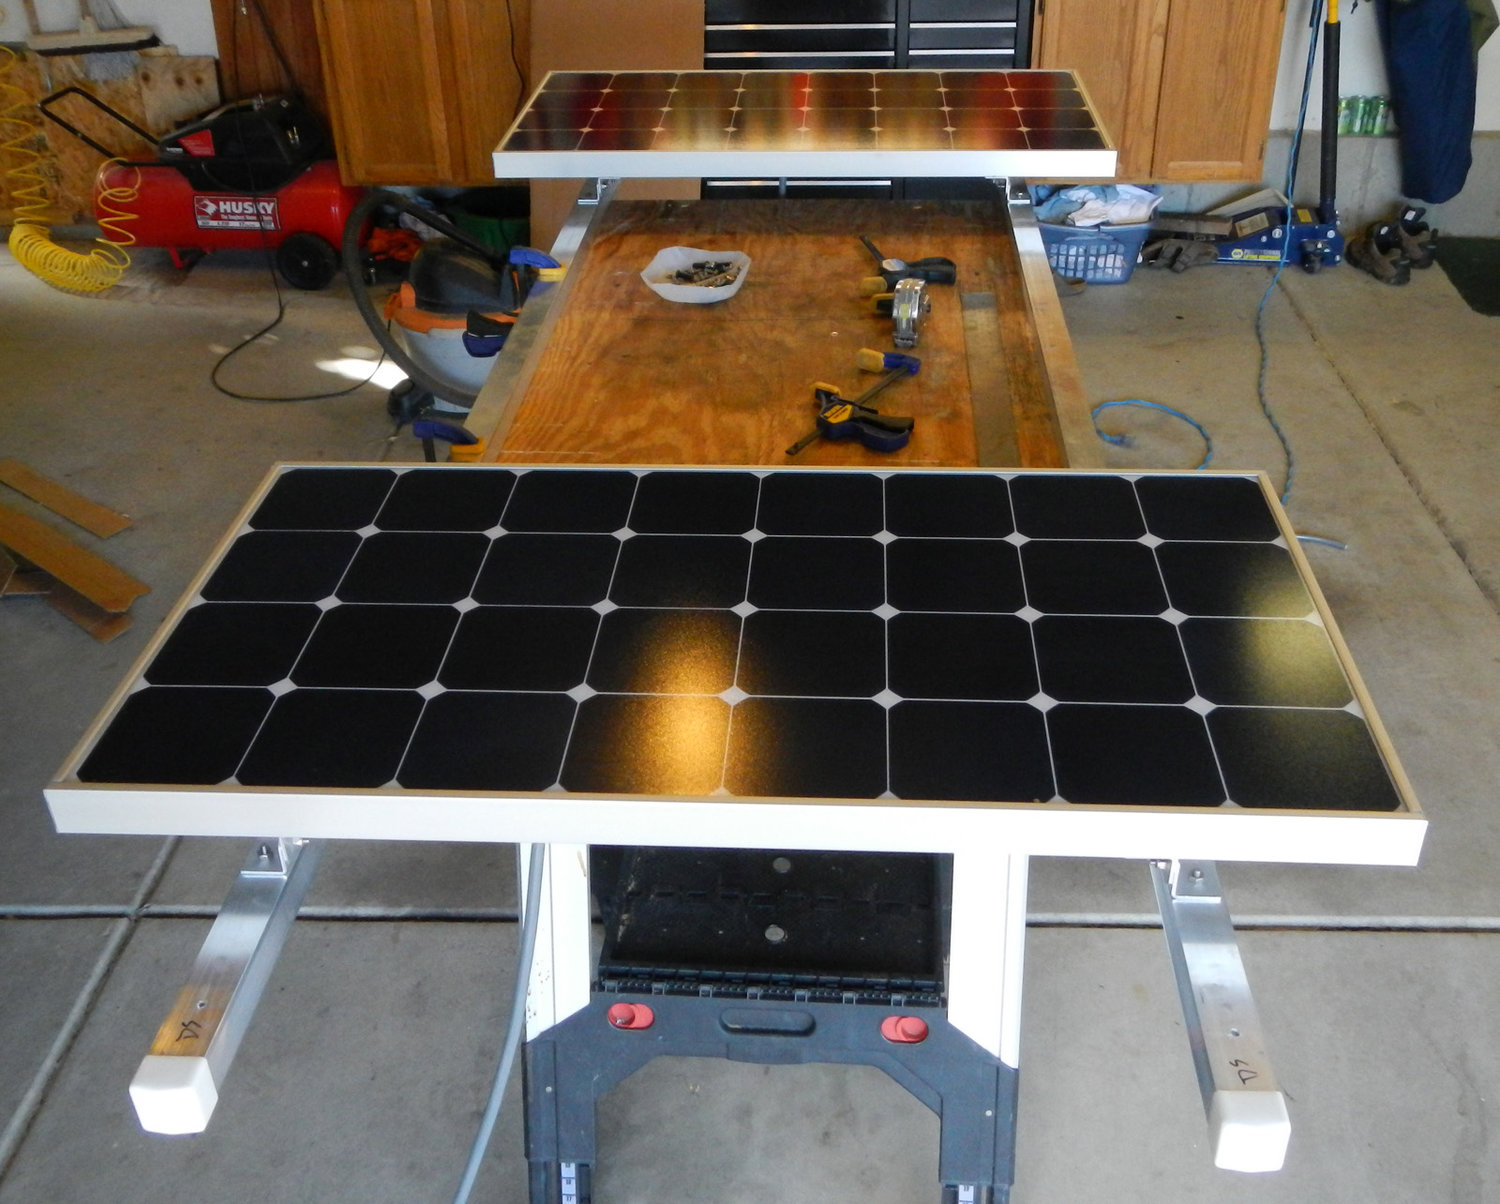
Below is a new SP100 panel from AM Solar. They prepped the panel with splice connectors, where I will hook up the roof wire. That way I can customize the length. They include shrink fit butt splices and shrink wrap in the kit. Both have adhesive inside, which seals up the connection when heatshrunk to fit.
Once I completed adding the right length of wire to the panels, I was ready to dry fit the Carmanah panels on crossbars, which I will bolt to the top rack. I am installing 2 panels on the rack, and the 2 panels on the roof surface.
That completes the ground work, tomorrow I will be up on the roof.
Day 2
Not really a full day, my knees were shot after I finished the roof mount of the 2 new SP100 panels. I located these 2 panels in more/less the same spot as the Lance mounted panels. I used the AM Solar mounts with two 10/32 well nuts per foot (3/8″ hole into roof). Before Dicor…
The front panel was a major PITA to locate and mount, mostly because of a touch of acrophobia. A view, part way along. Before setting the mounts, I washed with soap and alcohol. Then, peeled the paper off the VHB tape under the feet. I had predrilled the feet for the well nuts.
Once the mounts were all placed, it was time to slather on the Dicor. I tipped up the panels, covered the new mounts, and patched the holes left behind when I removed the Lance panels. Tipping up the panels made the Dicor application easier.

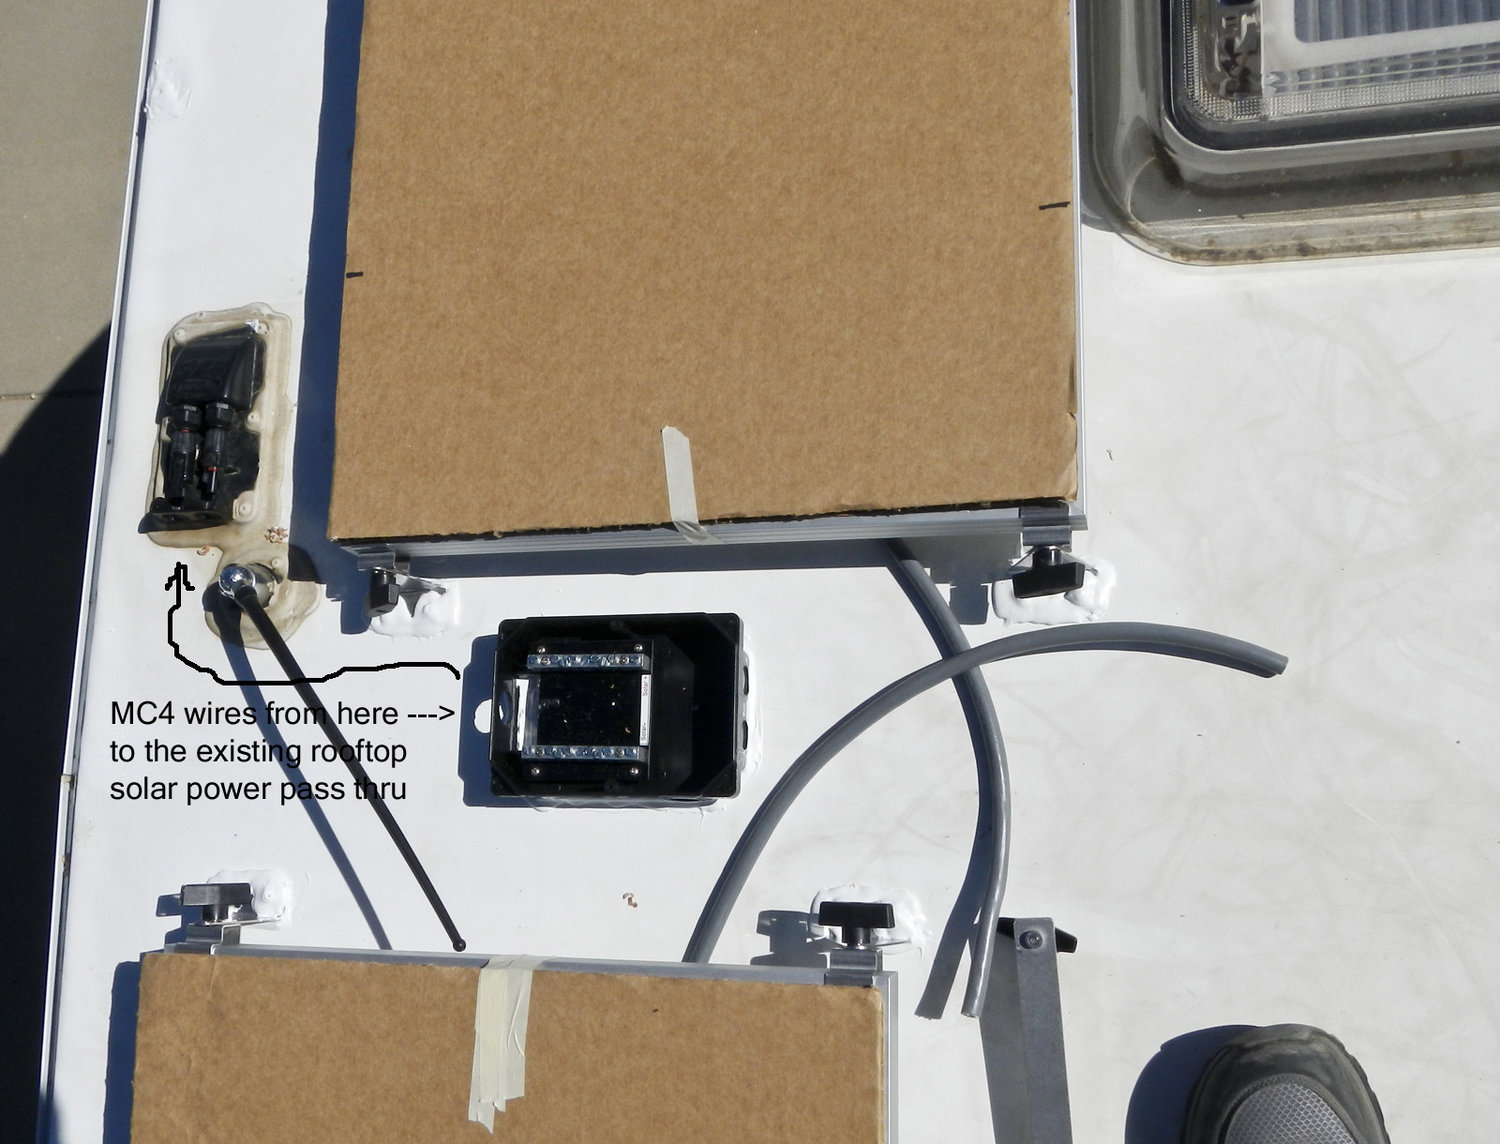
Final step today was placement of the combiner box. I placed it near the Go Power rooftop pass through. My plan is to wire the 4 panels into this box, and then use MC4 connector wires from the combiner box to the Go Power. The combiner box is stuck down with 2 strips of VHB tape and dicor.
I am using the factory installed wire entry and 10ga wires Lance buried in the ceiling, which should be about 5 feet in length to where I can connect up the inside wiring.
If weather allows tomorrow, I will install the 2 Carmanah panels on the roof rack, and wire all in the combiner box. Ok, time to knock off for the Bronco game.
Day 3
Day 3 of the install. Today, I installed the rack crossbars and bolted the 2 Carmanah panels to the rack. There was a moment of anger and a string of misc expletives when I discovered the rack on the curb side was slightly out of kilter, rotated a bit. I had to make a run to Ace for longer M6 bolts. Bolting up the panels to the crossbars went pretty well, but these mounts are not nearly as well designed as the AM Solar mounts I used yesterday.
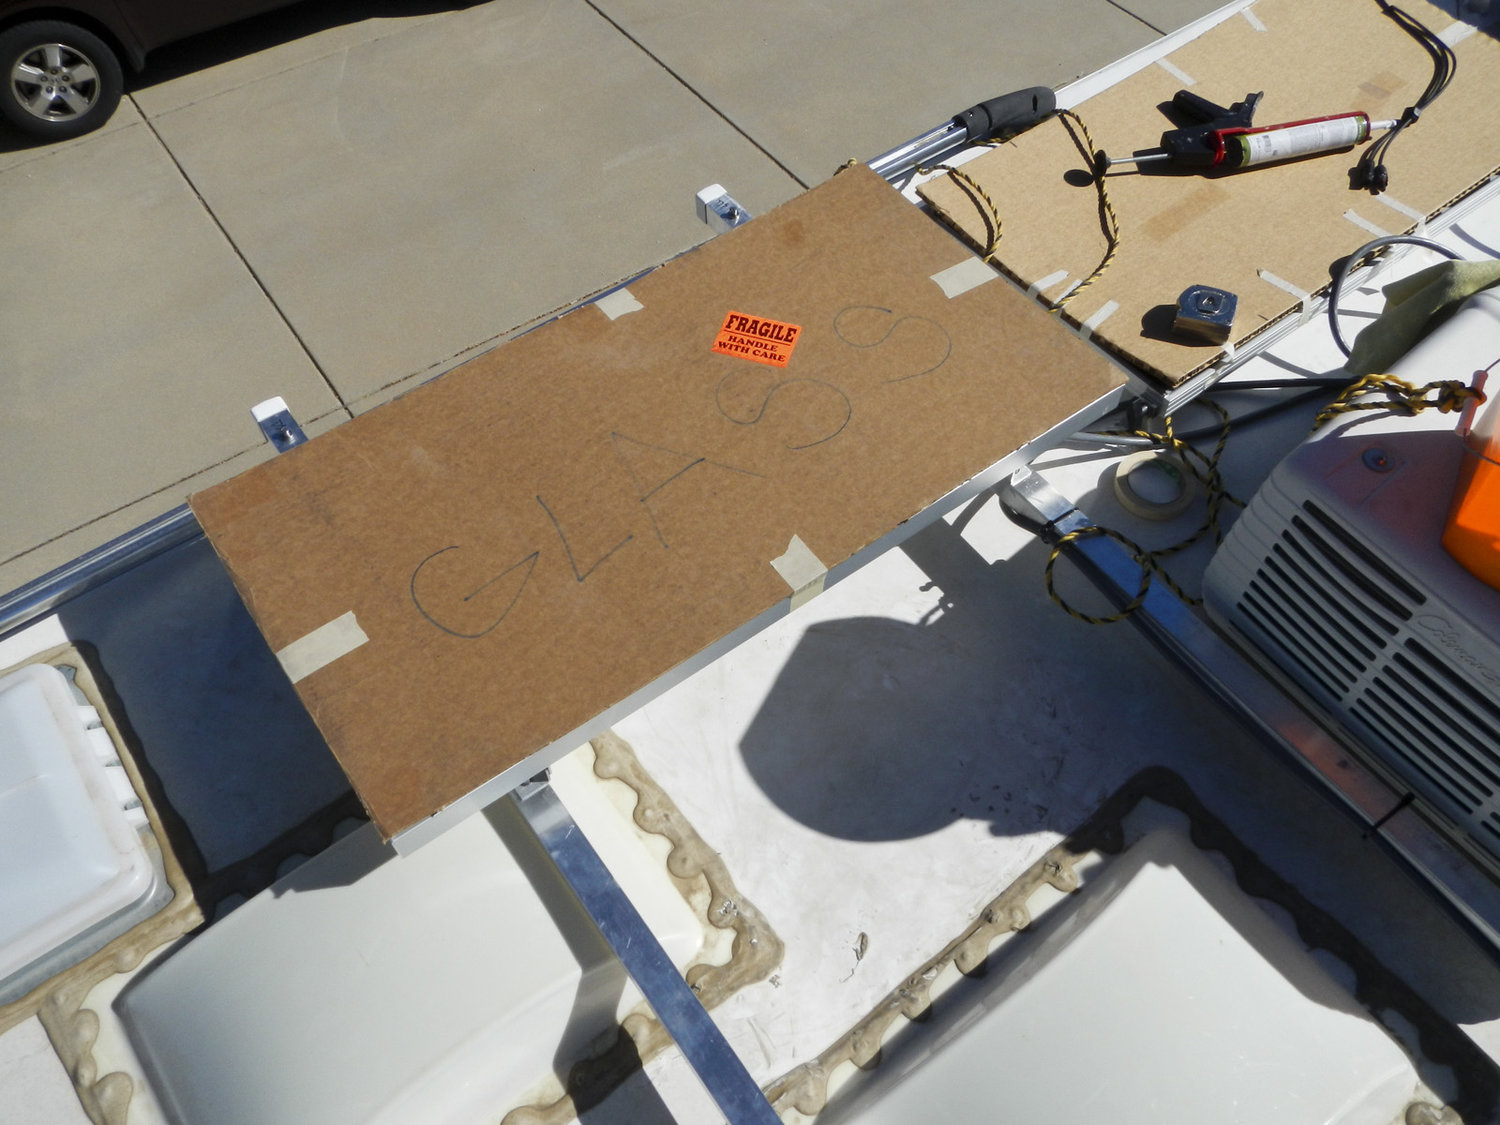
It is handy to cover the panels with cardboard, so tools and other stuff has a place to sit during the work. With all the vents and skylights, working on this end of the roof was challenging. My knees were barking, making me wish I had contracted an installer. Enuf complaining.

Once the panels were bolted on, I routed the wire to the combiner box and got busy stripping wire and making connections. Using a multimeter, I double checked the polarity as I wired up the panels. Then, I redeployed the MC4 connectors cut off the Carmanah panels to connect between the combiner box and the rooftop solar pass through.

Cleaned things up top, and then went inside to check things out with the voltmeter. Nearly 38v on the meter at the point where the interior wiring run will commence and with the right polarity, perfect.
My clumsy feet, hands, and elbows did manage to disturb the Dicor a bit. I need to get back up there this week and touch up the seal. I am taking a couple days off, then I will get going on the interior wiring and controller installation. Tune in later this week.
Day 4
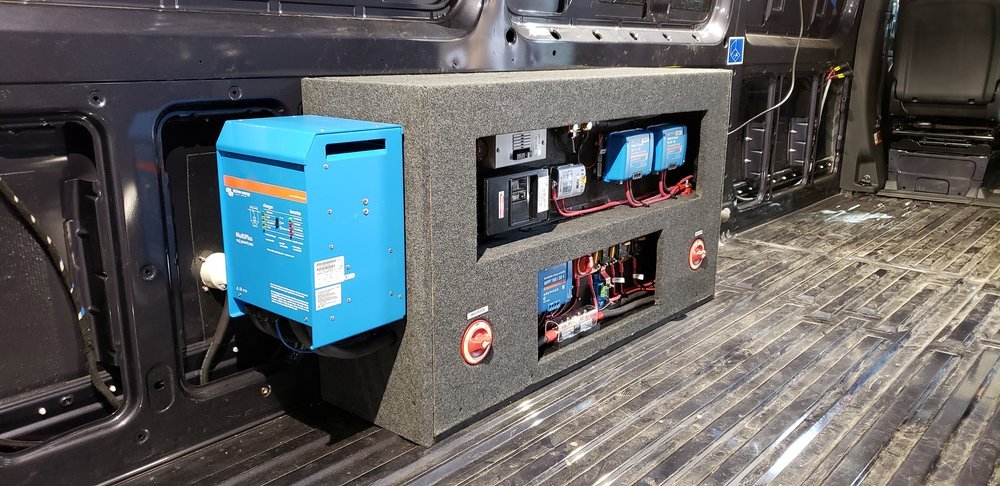
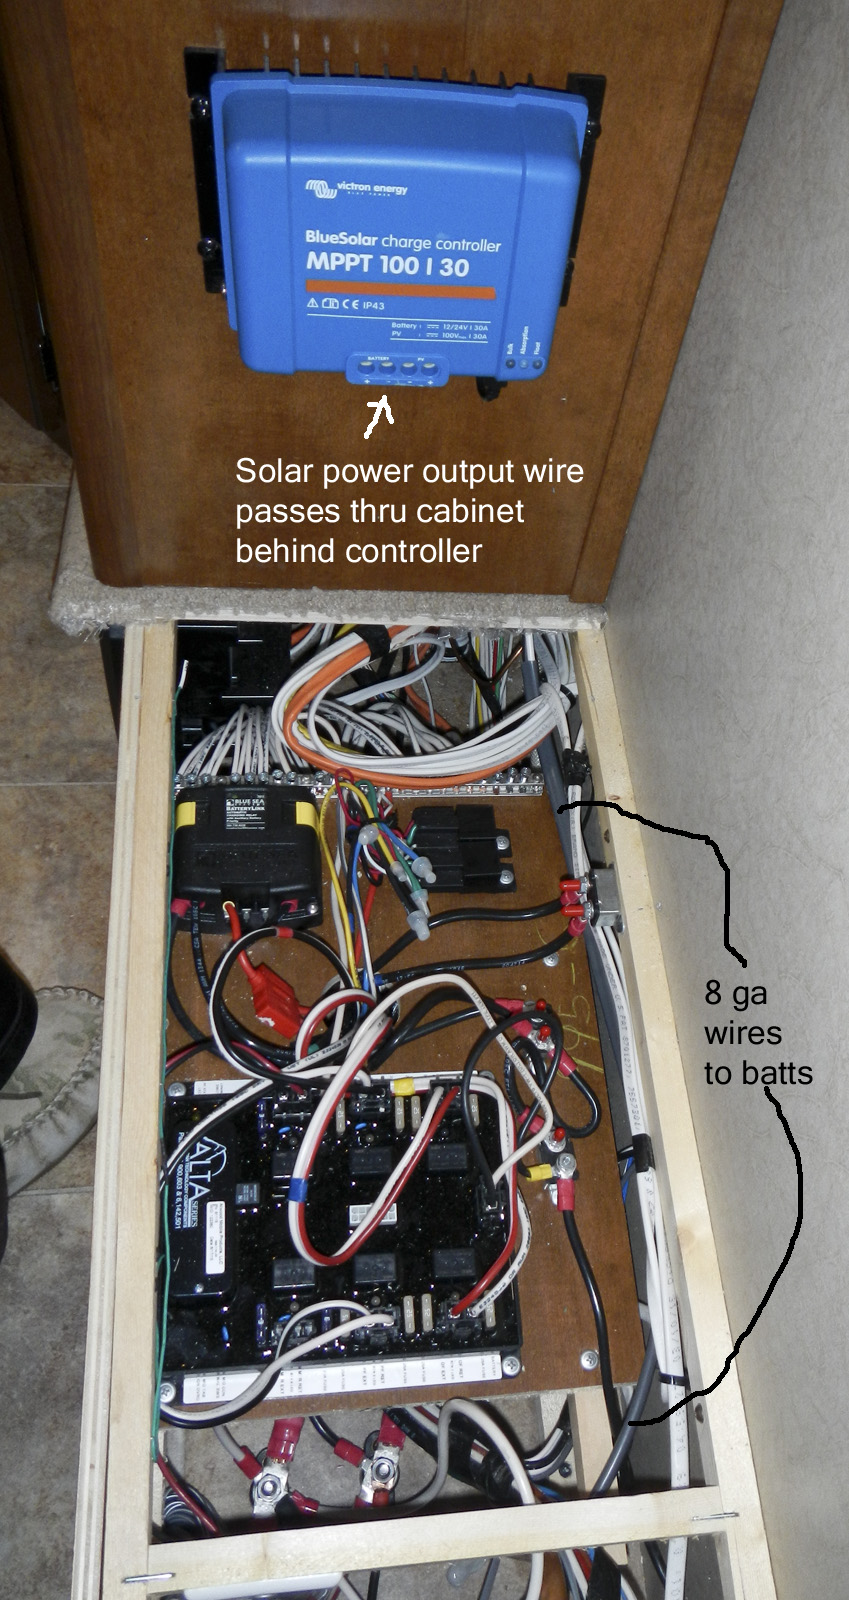
It is raining and chilly outside, but today, I am working inside. First up was to finalize the location of the solar controller. I had previously decided to bolt it on the side of the trash can cabinet. This is a convenient location as it is just a couple feet from the master battery connections located in the wiring cabinet.

This location is also a convenient place to conceal the wiring going to/from the controller.
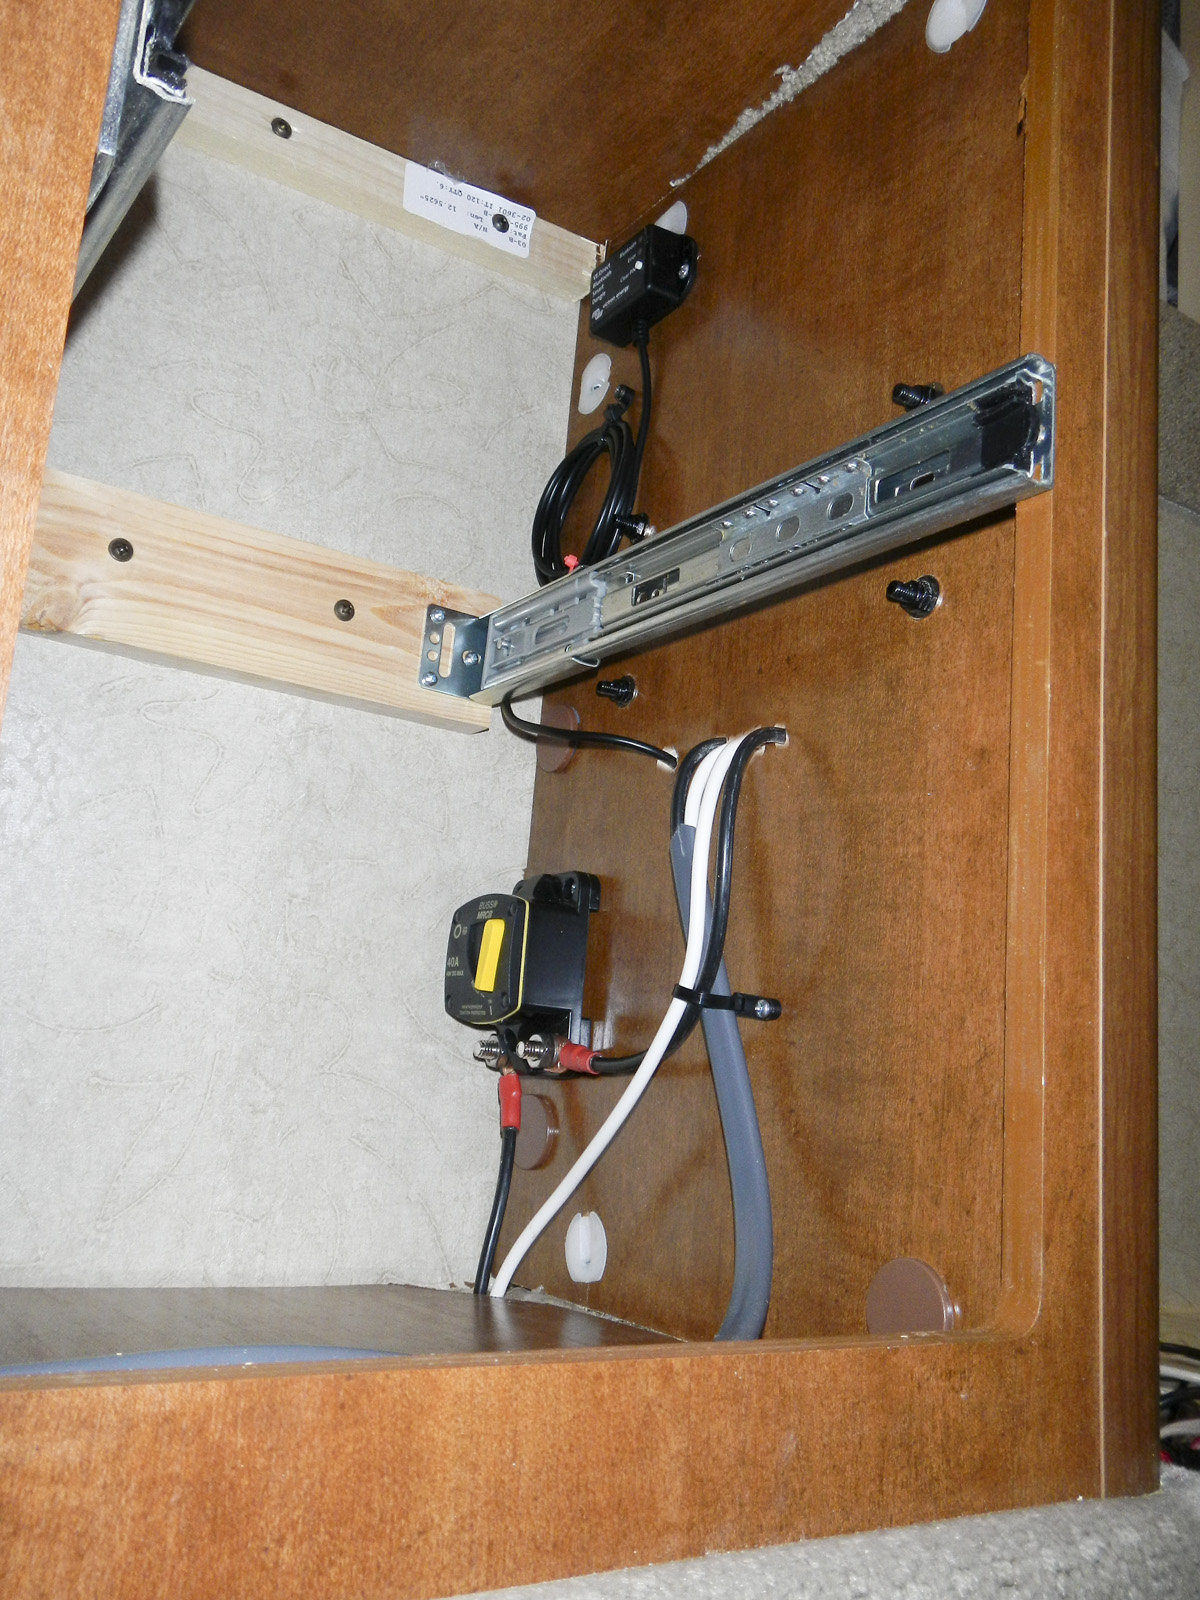
Inside the trash cabinet I have mounted the 40amp DC switch/breaker and the Bluetooth interface to the solar controller.
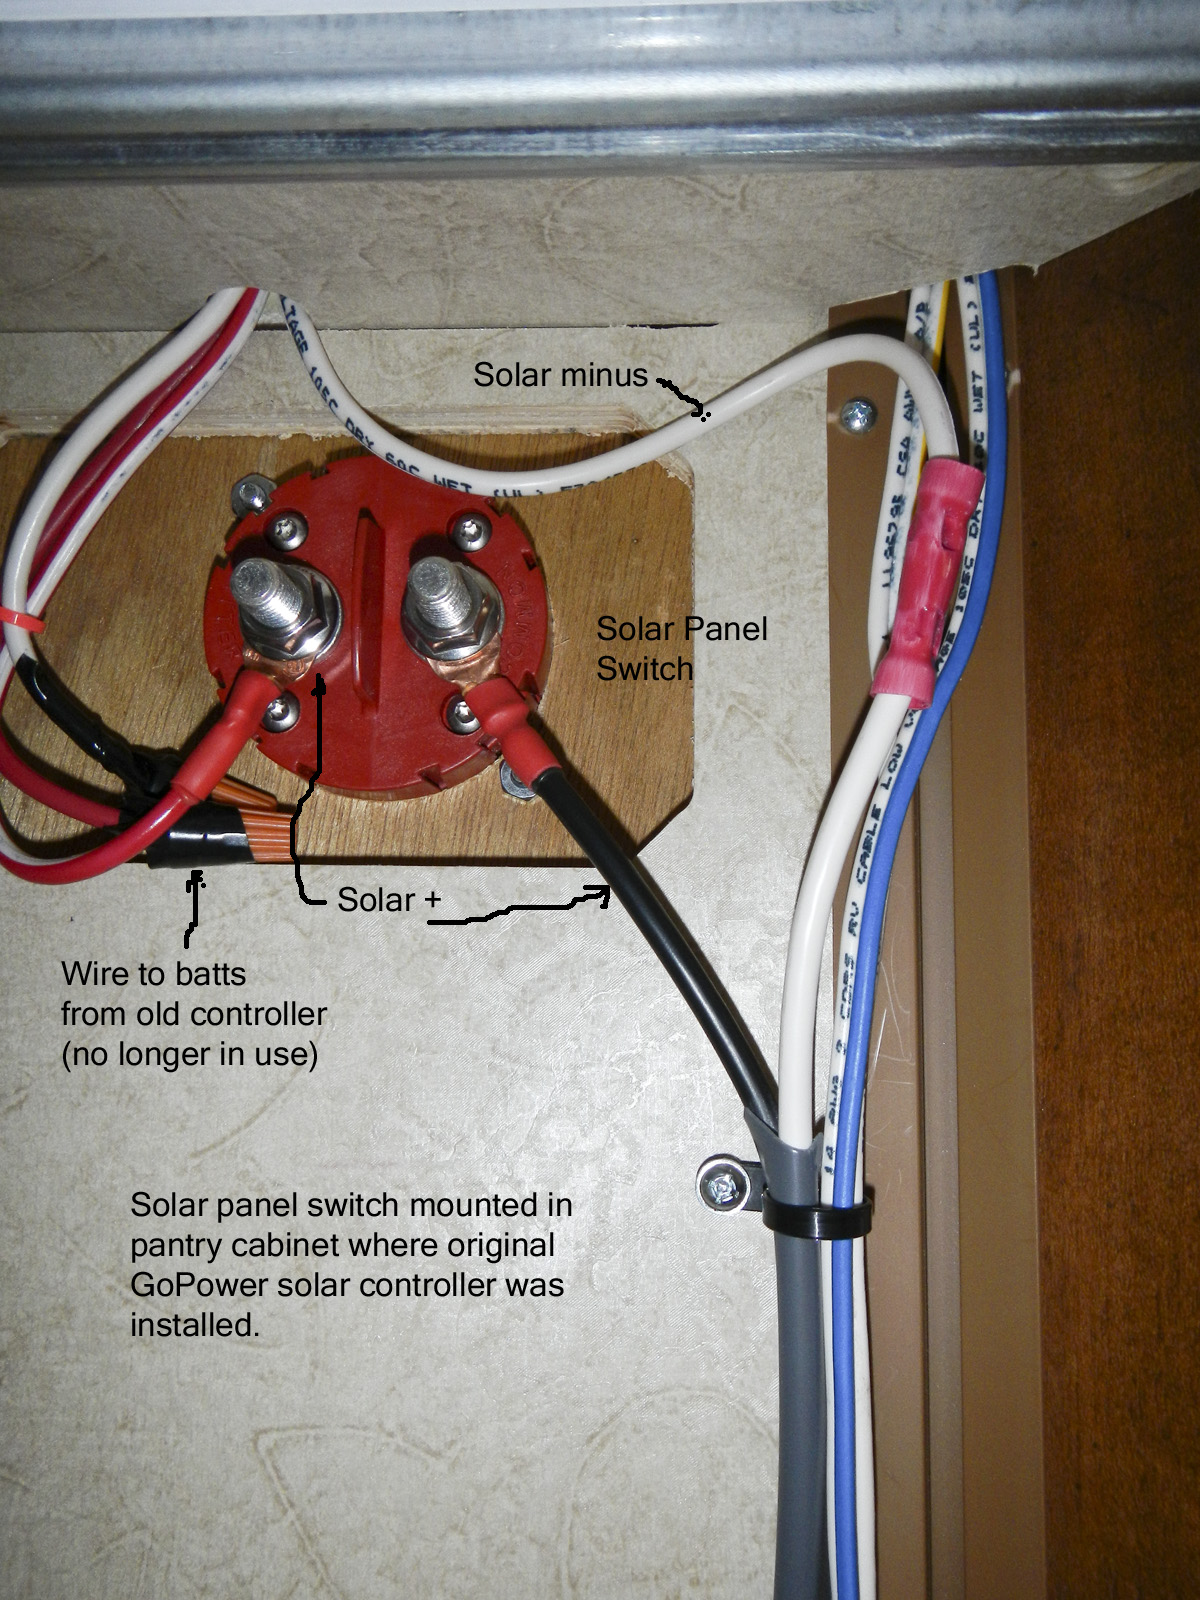
I located the master on/off switch for the solar panels over at the former location of the GoPower solar controller. I had to make a wire splice at that location, from the factory solar wires (which were previously connected to the GoPower) to the new 8 ga wire I installed for the run to the controller. I figured, I might as well put the switch there since the wires are there and the cabinet already has a cutout from the old controller.
By the time I got this all hooked up, it was getting dark outside. I will wait until morning to start testing.
Day 5
Testing day: Wow, finally.
I needed to pull some power from the batteries, so the solar would have something to charge. Easy, just turn the fridge on DC for 30 minutes. That drained off 15 a/h in 30 minutes.
Next up, I turned on DC power from the house batteries to the controller. Then, I went thru the process of Bluetooth pairing with my phone. Once I was paired, the app on the phone launched firmware updates automagically for both the bluetooth interface and the solar controller.
Finally, I was ready to switch on the panels. Looks like it is working. Here are screenshots from my phone showing the control and monitor views.
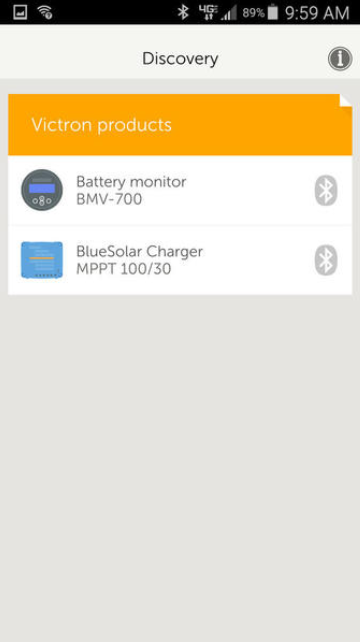
First, the discovery screen showing my battery monitor and solar controller.
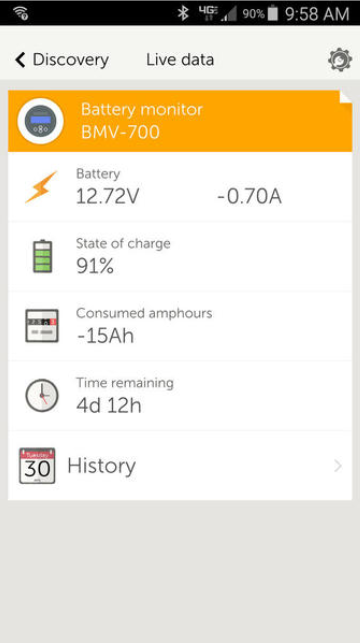
Next, the battery monitor shows the current battery status. This is with the panels switched off.
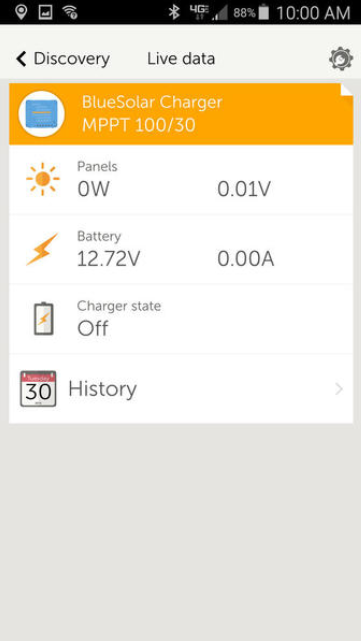
Here is the solar controller screen, with the panels turned off:
And the solar controller screen, with the panels turned on:
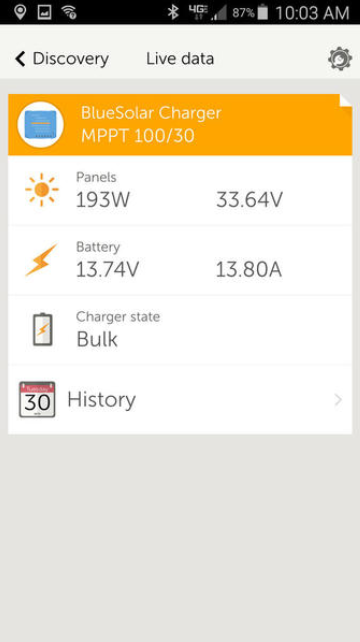
At the moment, 9am, the panels appear to be putting out almost 200w. The controller is pushing 13.8 amps to the batteries in Bulk charge mode. There are also history screens for both the battery monitor and solar controller. I can add those if anyone is interested.
More testing is in order, and then a shakedown camping trip somewhere nearby. The nearby trip seems like a good idea to make sure the panel mounting is ready for longer trips.