DIY Instructions
Solar Panels
The unique operating environment of an RV requires a different approach than what would be used in more traditional solar applications. Since we are mainly concerned with what is appropriate for RVs, this discussion will be somewhat narrow.
There are presently three commercially available general types of solar cells based on silicon: Amorphous (thin film), Poly-Crystalline (multi-crystal), and Mono-Crystalline (single crystal). Each manufacturer has a slightly different approach, different efficiencies and target markets. Know that all solar panels are NOT created equal, and most importantly, not all are appropriate for use on the roofs of RVs.
How they are made?
For the poly and mono-crystalline panels, the base material used is silicon. This is derived from quartz (SiO2), a constituent of sand. However, the high-grade quartz used for solar cell production is mined because there are too many impurities in common beach sand. This quartz is refined to produce nearly pure silicon.
The silicon is then blended with a small amount of boron, melted down and used to grow crystalline ingots. The ingots are then sliced into very thin wafers and impregnated on one side with phosphorous. This gives them an electrical charge, one side has a positive (+) charge and the other side has a negative (-) charge.
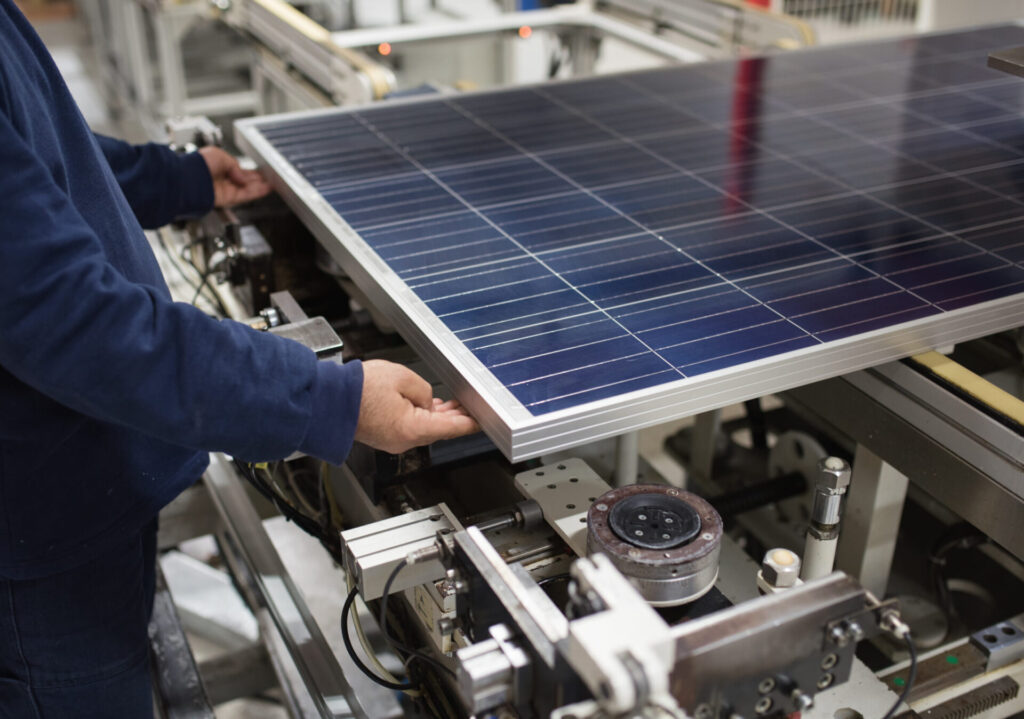
The wafers are then screen printed with a grid of silver paste. These wafers with grids are called “Cells”. A group of these cells (sandwiched between glass on top and a weatherproof back layer) is called a laminate. When the laminate is framed it is called a module (or panel).
The amorphous panels are made by depositing a silicon rich gas (silene) onto a substrate which is then etched and scribed into cells and modules. This is about as brief as I can get while still conveying the basic concept of how they are made. In actuality, the process is a lot more exacting and complex, but not really relevant to your RV.
How do they work?
The cells have a positive and a negatively charged side. In the middle of the cell where these two sides meet (the P-N junction) is an area where electrons are “loosely held” and can only flow in one direction. When sunlight strikes the surface of the cells, these electrons get excited and start moving around, following the path of least resistance (the silver grid). The voltage of these moving electrons is controlled by the number of cells connected in series [(pos.(+) to neg.(-), (pos.(+) to neg.(-),etc.].
Regardless of the size of an individual cell, it has a voltage of about 0.5 volts (0.475 to 0.625 volts depending on the manufacturer). This means that one volt is produced by connecting two cells (or half cells) in series (2 x 0.5 = 1). In order to develop enough voltage to charge a battery, you need 36 standard poly or mono-crystalline cells connected in series. According to our model, based on 0.5 volts output per cell, a 36 cell panel would produce about 18 volts (36 x 0.5 = 18).
(There is an exception to this 36 cell rule when using the much higher voltage SunPower back-contact cells. Our SP100 panels utilize 32 of these cells and still operate at about 17.7 volts.)
In actuality, you’ll find 36 cell panels on the market that produce anywhere from 16.5 volts to 19.5 volts depending on the type of cell and the manufacturer. This voltage may seem like overkill on a 12 volt battery bank, however there are several factors that contribute voltage losses that make this necessary. You can learn more about voltage losses here.
The size of the cell is proportional to the charging amps it can produce. The bigger the cell, the more sunlight it can receive, and therefore, the higher the amperage it will produce. It really is that simple.
All of our solar panels are custom made and operate at or above 17.7 volts. This extra voltage produces a big boost to the charging amperage when used in combination with the MPPT (Maximum Power Point Tracking) charge controllers in our SunRunner System Cores.
How reliable are they?
There is very little that can go wrong with a solar panel short of physical damage. In fact, all panels pass Jet Propulsion Labs Block V tests, which are: withstanding 125 mph wind loading, surviving one inch diameter hail at terminal velocity (52 mph), and thermal cycling at temperatures beyond what you will find here on Earth (short of tossing them into molten lava)!
There are no moving parts to wear out and they don’t consume any fuel. As long as there is enough light to cast a shadow on the ground, our solar panels will produce electricity. Crystalline solar panels are so reliable that they come with 25 year warranties and the amorphous panels now come with 5 to 25 year warranties.
Crystalline panels have been around long enough to have earned their 25 year warranties and there is no reason to expect that they wouldn’t last longer than 35 years. The Amorphous panels are relatively new to the scene and the earlier versions had some troubles with power degradation and delamination as they aged. Manufacturers have supposedly overcome most of these issues with newer versions and now offer 25 year warranties. However, they have not actually been around long enough to prove that they will survive those 25 years.
Amorphous panels may eventually outperform crystalline panels in price, durability and efficiency, but they still have a long way to go. All things considered, we currently feel most comfortable attaching our name to crystalline panels.
How efficient are they?
Since roof space on an RV is at a premium, efficiency is worth considering. Efficiency in this situation is defined as: How much of the available energy in sunlight is transformed into usable D.C. electricity? In other words: What portion of those approximately 1000 watts/square meter coming from the sun will be harnessed in the form of usable electricity?
- Amorphous panels are about 6 to 8% efficient. So you would expect to have about 60 to 80 watts/square meter of panels. Amorphous panels are the least expensive per watt but require twice the roof area to equal the power of the crystalline panels.
- Screen Printed Poly-Crystalline panels are about 14 to 16% efficient. So you would expect to have about 140 to 160 watts/square meter. Screen printed crystalline panels are slightly more expensive than amorphous panels, but require about half the roof space for a given amount of power.
- Screen Printed Mono-Crystalline panels are about 15 to 17% efficient. Even though mono-crystalline cells are more efficient than poly-crystalline cells, they are more round and don’t pack as tightly as the square, poly-crystalline cells do in a panel. Expect to have about 150 to 170 watts/square meter. Screen printed mono-crystalline panels are priced like their poly-crystalline cousins and need essentially the same amount of space.
- Our SP100 Back Contact mono-Crystalline panels are about 18.3% efficient. These cells don’t have the screen printing on the front which allows for more active surface area. These cells are in short supply and may not be available long term.
What affects output?
There are several factors that affect the output of solar panels. The most important ones are listed below:
- Light Intensity – The brighter the sunlight the more power the panels will produce. This is effectively a straight-line correlation. This means that if there is 1000 watts/square meter of sunlight, you will see the full rated output of the panel. If there is 500 watts/square meter, you will see half the rated power of the panel.
- Shading – The shade caused by tree branches, TV antennas, satellite receivers or air conditioners will dramatically affect the output of solar panels. Because of this, it is important to keep your panels clear and not place them where they will be near shadows. This is most important during the 3 hours either side of solar noon (9AM to 3PM Standard time or 10AM to 4PM Daylight Savings time) as that is when you receive about 95% of your daily charging power. In the morning and evening, the sun is at a lower angle, and it is sometimes hard to avoid shade from objects that are permanently attached to your roof. But, the intensity of the sunlight during those hours is less; and, the contribution to the daily charge is relatively small anyway.
- Cell Temperature – Solar panel cells are dark in color and operate much hotter than the ambient air temperature. The hotter these cells are, the lower the operating voltage. The lower the voltage, the lower the wattage (Volts x Amps = Watts). This is why it is important to use panels that have operating voltages above 17 volts at 25 degrees C. It takes 14.1 to 14.4 volts to fully charge most batteries (some want 14.6 to 14.8 volts) and a 17 volt panel may drop about two volts when it gets hot. When you add other voltage drops caused by wire size, connections and the controller, you may not be able to push the batteries up to the voltage required for full charge.
- Sun Angle – When the surface of your panels is not exactly perpendicular to the incoming sunlight, the cross sectional surface area of the solar panel exposed to the sun will be reduced, and you will lose some of that sunlight to reflection off of the panel’s surface. Typically, solar panels are mounted flat to the roof of an RV roof, which means that your panels will likely never be perfectly oriented toward the sun. This is most pronounced in the winter when the sun has a lower path across the sky. That being said, there are tilt mount options that will allow you to point the panels toward the sun and increase production slightly. But, it is very important to lay them back down before you take off down the highway!
- Improper Wiring – Poorly made electrical connections create resistance, which results in less power going to your batteries. Make the connections tight, and keep them clean. Also, be sure to use the proper wire gauge for the amount of current you plan to carry. Using wire that is too small will result in voltage drop and system inefficiencies.